Strona w trakcie tłumaczenia
Niniejszy artykuł powstał na podstawie artykułu o tym samym tytule, znajdującego się na angielskiej Minecraft Wiki.
Nether to groźne miejsce - odpowiednik piekła, zaludniony przez Zombie pigmanów, Ghasty, Płomyki, Kostki magmy i Mroczne szkielety. Zastanawiacie się więc: po co w ogóle zapuszczać się w takie miejsce? Na początek, nie ma tam w ogóle Creeperów, a poza tym jest miejscem, gdzie znajdziemy wiele rzadkich i użytecznych składników Mikstur. Dodatkowo, znajdziemy tu pokłady netherracku (który pali się "wiecznym ogniem") oraz Piasku dusz (a od wersji 13w01a także Kwarc). Nether może także służyć jako stacja przesiadek podczas podróży na duże dystanse (więcej informacji w tym poradniku). Niniejszy tutorial pomoże Wam na dobre osiedlić się w Netherze.
Tworzenie Portalu Netheru
Sam Portal Netheru został już opisany na tej Wiki.
Jeśli nie posiadamy w ogóle obsydianu, możemy go stworzyć (zalewając lawę wodą) stopniowo obudowując go formą, o wymiarach 3x6x6. Taką formę odlewniczą musimy stworzyć z bruku lub innego niepalnego materiału, stopniowo dobudowując kolejne poziomy i formując bloki obsydianu w pozostawionych otworach. Taki kanał odlewniczy, skuwamy po zakończeniu pracy i aktywujemy portal w normalny sposób (krzesiwem).
- If you don't have any obsidian (perhaps not enough diamonds for a pickaxe?), but you do have iron buckets and available lava (a small lake or many flows), it is possible to "cast" a gate in place.
- Note that this process will not work if you're already in the Nether—you'll have plenty of lava, but no water.
- You will need at least 10 (up to 14) lava source blocks (carried in buckets), and another bucket of water. You don't need all the lava ready at once, but having at least 2 at once will save you some trouble.
- Build a mold out of dirt for the bottom: a trench 1 wide and 2 or 4 long.
- Fill each block of the trench from a lava bucket, then place your water on a mold block to flood the lava and turn it into obsidian. (If it turns into stone or cobblestone instead, you misplaced a source block. Just mine the cobblestone out and try again.)
- Extend your frame upwards and repeat the process to mold the next layers: Three levels of two separated pits for the portal sides, then another trench for the top.
- Dig away the dirt frame, and light your new portal!
Preparing For The Nether
First, gather your supplies and tools, remembering that you are likely to get killed a few times while learning how to survive in the Nether. You're going to be going through a lot of cobblestone and iron, so make sure you've got plenty of those laid in at home.
Basic supplies
- Blocks: Start with at least two stacks of cobblestone for shelters and paths, and a stack of gravel for pillar-jumping and descending cliffs. A little colored wool may be handy to provide distinctive markers.
- Supplies: At least quarter-stacks of wood and iron ingots for tools, and perhaps some string for bows.
- Food: And plenty of it, favoring bread over heavier stuff. It is vital to keep your Hunger Bar filled at all times so that you can regenerate health (Cookies or melon slices may be useful for quickly topping-off your hunger bar.) Mushrooms are fairly abundant in the Nether, but mushroom stew is clumsy, and as with the heavy meats, you won't get full benefit unless you let your hunger get dangerously low.
- Armor and tools:
- Don't risk diamond equipment unless you can afford to lose it. In general, you want at least iron all around. Enchantments are good, but some enchantments are useless in the Nether (Flame, Fire Aspect, Aqua Affinity, mostly Respiration). Remember that "generic" Protection includes Fire, Blast, and Projectile Protection. Especially useful: Unbreaking tools, Feather Falling.
- You really need iron armor for decent protection, and iron's tool durability cuts down on awkward moments. Remember, there's no Cobblestone in the Nether except what you bring, and you'll be wanting that for shelters and paths!
- An axe will get little use, but may be helpful recovering wooden stuff that you've placed. Consider skipping it.
- A bow (enchanted if possible) and a full stack of arrows, for taking down ghasts.
- Be sure to bring a flint and steel, to re-light your Nether Portal if needed.
- A full stack of torches. While in the Nether, you can sort of see without light sources, but not very well, and the torches are good for marking stairways. (Also, you do see better when things are lit.)
- Jack-o-lanterns. There are much more durable than torches, and more distinctive at a distance. Place them facing back along the route to your portal.
- Ladders, up to a stack. Lots of cliffs here!
- Iron bars can replace both fences and glass panes—bring a whole stack. They can also be used to block lava flows, but remember that mobs can jump onto single-height iron bars.
- 14 (at least 10) obsidian, if at all possible - if your portal emerges somewhere really unreasonable, you may want to build a return portal somewhere safer.
- Optional items:
- Optionally coal and (more) wood, to make more torches as needed. Note that there are no smeltable ores in the nether, so this is the only reason to bring coal. Once you find a Fortress, Wither Skeletons will also provide some coal.
- An iron door or two can be helpful for securing your shelter. Don't forget some stone buttons and/or levers to open them! (pressure plates and tripwires are an option, but may be tripped by wandering mobs.)
- A half-stack or so of Cobblestone Stairs can be helpful to make ramps around your base, or elsewhere.
- Dirt, for growing plants and perhaps as a marker.
- Wooden fences and doors are less useful because of their flammability, and glass panes because of their fragility, but they do block mob vision while they last. Fences can also keep out wandering Zombie Pigmen, whereas iron bars won't.
- Snow blocks to make snowballs may be useful, especially against blazes, which are damaged by them.
Enter The Nether
When you first enter the Nether, you may be awestruck by the amazing structure of it. Don't get too caught up in the scenery, though, as the Nether is a dangerous place. For your first visit, the main threats will be falling, fire, and especially ghasts. The falling and fire can be handled in the usual ways, but watch out for sudden drops and holes, which may be hard to spot in the confusing netherrack landscape.
Your most immediate threat is probably going to be ghasts. (You may meet some magma cubes, but those are straightforward to kill. Don't mess with the zombie pigmen just yet!)
Protecting Your Portal
Your first order of business is to build a cobblestone shelter around your portal. This needs to be at least 5 high, but the portal itself can be part of the roof. Use iron bars for windows. Make sure to leave enough space for a crafting table and a chest or two. Don't forget the door, either - wood will do until you figure out where an outside button or lever won't be vulnerable to fireballs.
Again, making a small base around your portal is a must, but making it out of netherrack is not safe, as Ghasts can destroy Netherrack quite easily. Brick, stone, and such will all suffice, but cobblestone is cheapest in the Overworld, and it is completely Ghast-proof. Digging caves out of netherrack may be easy, but then ghast fireballs can make a real mess of your lair....
Later on, you can start to make nice houses and bigger bases in the Nether, but for now, a cobble room with the portal, a chest, and a crafting table, is sufficient. (The chest is important if you don't want to lose too many of your items whenever you happen to die.) The only necessities are a pickaxe and sword (iron), food, bow and arrows, dirt or cobblestone for stopping lava, a flint and steel and a shovel for soul sand and gravel. The rest of the items, or extra food can be stored in the chest.
To prevent mobs from spawning in your Nether home/base, you can use transparent items or half-blocks as the floor. However, be warned that mobs can spawn on the Nether Portal itself.
The second order of business is making the table and a chest, then stashing most of your supplies, anything you don't want to risk carrying with you. You may well be able to expand the shelter later, or dig out a larger living space, but protecting the portal comes first. Be cautious of leaving netherrack walls or even floor, as a stray fireball can blast netherrack away or set it on fire.
Special cases
- You may find yourself under fire from ghasts immediately upon entering the Nether. Don't panic, just concentrate on building a wall between you and the ghast, bouncing fireballs back when you can. Re-light your portal if needed, then extend your wall around the portal.
- If your portal emerges floating over a lava lake, you'll get a few extra blocks of ledge at the bottom, but you'll still want to build that out into a platform, then continue building a path to safety. Then build a shelter there, and a new return portal within it. Deactivate the old portal before you use the new one, so that your portal in the Overworld will link to the new one.
- If you manage to get hit with both of these at once... well, that seriously sucks, but it's not guaranteed unsurvivable. Try to bounce the fireballs back at the ghast in between placing cobblestone as above....
If your portal gets blasted
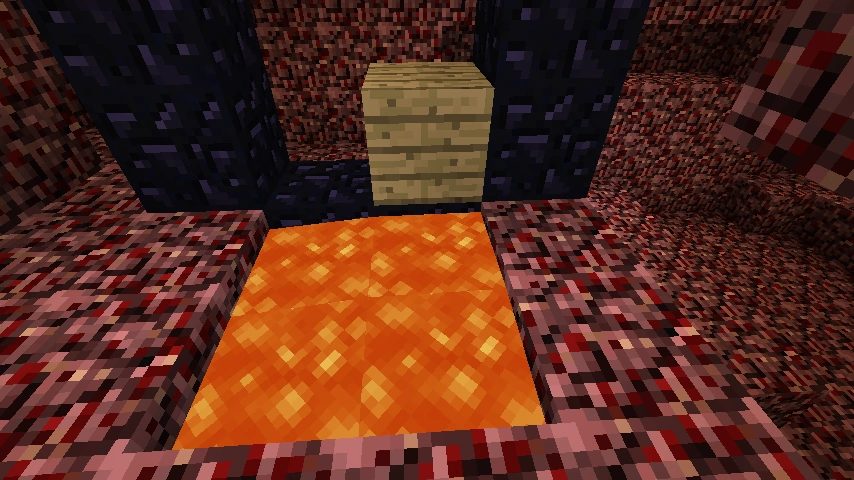
Your first recourse should be your handy flint-and-steel. If for some reason you don't have one, all may not be lost. If the portal was exposed enough to get hit by a Ghast fireball, maybe you can convince that or another Ghast to hit it with another fireball, which will re-light it.
If you don't have the nerve or armor for that, you can try other means to get a fire in there. The picture shows one method -- it was done in the Overworld for convenience, but the same idea will work in the Nether. (It does take a while for the block to catch, and will only sometimes light the portal when it does burn away). If you also lack a bucket, you may be able to channel lava past the portal, or even build a trail of wooden blocks (planks are cheap, but wooden slabs are cheaper) to the nearest fire. (That last method will be especially tricky, as fire doesn't always catch. Try making it wider than one block....) Note that fire spread depends on difficulty -- getting it to spread into the portal will be paradoxically harder on Easy difficulty, even worse on Peaceful, and rather easier on Hard. In any case, do try not to torch anything important in your base. Also, before you convert all your wood to slabs, you might want to make a couple of chests....
As a last resort, if you have (or can make) a chest or two, you can stuff all your equipment into the chests (don't forget your armor), then commit suicide. You will respawn in the Overworld, and can re-equip yourself at leisure (especially your wayward flint-and-steel!). Then go back through the portal (perhaps creating a new portal frame in the Nether) and collect your stuff.
Lighting a fire
As of 1.4.2, Wither Skeletons now spawn in Nether Fortresses. If you happen to spawn close to one, find a Blaze and collect its rod, a Wither Skeleton for its Coal, and slay the Ghast that deactivated your portal for its Gunpowder. Turn the rod into Powder, then combine the three in the 2x2 crafting grid for a Fire Charge, which can reactivate your portal.
Fending off Ghasts
Ghasts are one of the hardest mobs to fight in Minecraft, mainly because of their floating ability and their long-ranged fireball, which does considerable damage (in Minecraft 1.0 and later, one direct hit can kill you, though armor will help). The fireballs are fairly easy to dodge, but they also tear up the landscape, not to mention setting it afire. The classic defense is to build a mini-shelter out of cobblestone, 3 blocks high with a ladder to let you poke your head (and bow) over the top, and preferably a 3×3 roof two squares above that.
As mentioned above, the best way to take them out is with a bow and arrows; however, you can also repel their fireball back at them by left-clicking on it as it approaches you (if you manage to hit them with their own fireball, the ghast will be killed, and you'll get the "Return to Sender" Achievement.) Be forewarned that this takes practice, so don't expect to use this method as your sole defense against Ghasts. A final note about Ghasts: aiming and hitting them can sometimes be challenging. Their hitbox is the bottom half of their model (their tentacles), so hitting their 'head' doesn't damage them. On the other hand, if you manage to catch one from above, you can shoot through their head to hit the vulnerable tentacles!
Materiały w Netherze
- Netherrack, piasek dusz, żwir, lawa, i glowstone są wszędzie. Jeśli chcesz wydobyć glowstone, musisz się podsadzić, na sufitach znajdują się duże żyły, po małej eksploracji możesz znaleźć bardziej dostępne żyły. (Miejsca z niskim sufitem)
- Czerwone i brązowe grzyby są gdzieniegdzie porozrzucane.
- Ghast'y czasami upuszczają łzy ghasta i/lub proch.
- Kostki magmy mogą upuścić magmowy krem.
- Zombie pigmeny czasami upuszczają zgniłe mięso i samorodki złota. Od 1.2, mogą upuścić złoty miecz, sztabki złota i złoty hełm. Atakując ich możesz zginąć, gdyż atakują grupami - patrz strona z mobem.
Kiedy znajdziesz Netherową twierdzę, możesz spotkać w niej następujące materiały:
- Netherowe cegły, Netherowe płotki, Schody z netherowej cegły. Są one odporne na kule Ghasta
- Brodawki możesz sadzić na Piasku dusz. Od 1.3 brodawki można sadzić w zwykłym świecie, pod warunkiem, że postawimy je na piasku dusz.
- Blaze'y upuszczają płomienne różdżki, i są ich jedynym źródłem.
- Obsydian do tworzenia Portali
- Od 1.4.2, Mroczne szkielety czasami upuszczają głowy, można je użyć do przywołania Withera. Upuszczają również węgiel, i kości(mączka kostna do farm).
Exploring The Nether
When exploring the Nether, there are a few things to remember:
- Hostile mobs are common, and can spawn anywhere there is space. Luckily, what are perhaps the two most dangerous Nether mobs - ghasts and blazes - have special spawning needs. Ghasts require a 5*5*5 space to spawn, free of transparent blocks and slabs. Blazes spawn only in Nether Fortresses, and only below light level 12. Zombie pigmen are common as well -- while they start out neutral, they can easily get in your way so that you accidentally attack them (say, with your pick).
- Be generous about laying down cobblestone paths and putting up ghast shelters preemptively. If you need more cobblestone, go back to the overworld and get more.
- If you die in the Nether, you will respawn back in the Overworld (beds in the Nether explode when you try to sleep in them). As long as you stay in the Overworld, Nether time is frozen. In particular, you can take all the time you want to re-equip yourself and plan; when you do go back, if you can get from the portal to your death site within 5 minutes, you may well be able to retrieve anything not lost to fire, lava, explosions and (your own) cacti. If you're playing in multiplayer, this may not apply - if there are other players nearby in the Nether, they can keep the chunk loaded and the clock running. Also, they might save and/or steal your items!
- Navigation is tough:
- Compasses and clocks will spin wildly, (although the day/night cycle continues while in the Nether), and maps made in the overworld don't work either.
- You can activate a blank map in the Nether, and use a crafting table to zoom it out a bit. However, such a map will only show the bedrock "roof", and the direction indicator spins randomly, so it's not nearly as useful as an overworld map. On the other hand, it does give some idea of where you've explored, and the marker is in the correct location on the map. While maps are no longer centered exactly at their creation, you can put framed clones of the map on your portals, and those green markers will also be in the correct locations.
- When exploring, try to keep going in one direction until you reach an impassable obstacle (wall, cliff, lava lake), and leave a trail of markers along the path from your base, so you can easily find your way back. Dirt and torches are recognizable, but Jack-o-lanterns let you point the direction to your base (all the above are vulnerable to ghast fireballs, but unlike torches, Jack-o-lanterns will remain if the netherrack supporting them is blown away.) Cobblestone arches (as well as any paths you've made) also work well as they resist Ghast fireballs, are easily distinguishable from surrounding Netherrack, and can be positioned so that passing through them orients you to the direction you came.
- The debug screen provides your coordinates and facing—this is also helpful for choosing where to place a new gate back to the overworld.
- Netherrack blocks have an L on the top face that can help you orient yourself (see the block page for details).
- This cannot be restated enough: Be sure to build a base. This way, if you accidentally attack a mob of zombie pigmen or have a ghast on your trail, you won't run back to your base only to realize that it consists of an exposed Nether Portal and nothing else. Again, as ghast fireballs can blow large holes in Netherrack walls, you should construct your base out of cobblestone, stone, or, for a decorative look, stone bricks. Not only do these blocks have the necessary blast resistance to withstand a ghast fireball, they also are not found naturally in the Nether. This makes it much easier to identify your base from a distance.
Nether Fortresses
One of your main objectives in the Nether will be to locate a Nether fortress. To see all the features of the Nether Fortresses visually, try this video here. Basically, their straight walkways and tall pillars are unmistakable, but may be dimmed by distance. Be sure to look carefully into the abyss beyond the edges of the areas you explore; if you're not using Far Render Distance already, you can occasionally switch to it so as to see farther. Even after spotting one, you may well need to find a way to get to it, or even build a bridge to it. (Suggestion: three-wide Cobblestone, with two-high iron bars for railings, and a roof. Those ghasts get really annoying when you're out on a bridge… you might even put in a couple of turrets for sniping at them, too.)
Once you do find one, it is a good idea to make sure you have the necessary supplies to gather its many resources. So, head back to your base, or even back to the Overworld, and get, at a minimum, a stone pickaxe, an iron sword and lots and lots of food. There are a few things that are of the utmost importance when exploring a Nether Fortress:
- Explore the Nether Fortress thoroughly. You might not find much, but every once in a while there will be a Nether Wart plantation, or a Blaze Spawner. These are great finds as only place you may find these is in the fortress. Details on Nether Wart Farms can be found on the Nether Wart Farming page.
- Wither Skeletons are scary, but slow… and they can't go through a 2-block high doorway.
- When exploring a Nether Fortress, always place torches to your right - that way when you want to get out you just make sure that the torches are on your left. Jack-o-lanterns make this even simpler — always face them toward the exit (or where you need to go to reach said exit).
- If you come across a Nether Wart plantation, collect as many (if not all) of them as you can, then replant the plot (you'll have plenty left over). Then go back to your base and create a Nether Wart farm by planting it on Soul Sand. You must be less than 150 blocks away (chunk radius) in the Nether for it to grow, but that's the only condition — nether wart doesn't care about light or water. As of version 1.3.1, Nether Wart grows in the Overworld and The End, so you can take the farm back to your overworld base. Note that you don't use all that much, so a half-dozen blocks of soul sand will support a brewery and then some.
- You may well want to build a portal leading back to the overworld from the fortress. Having an Overworld base handy will provide all the supplies you need.
- When you find a Blaze Spawner, you have a choice: turn it off, or farm it. There will usually be at least two Blaze spawners per fortress, and if several fortresses have joined together there may be more. So, don't assume the first one you find is your only option, but you will need to fight Blazes at least once "the hard way". That first fight may be fairly tough, but together with the nether wart, it will give you the means to make potions... including potions of fire resistance. Those will make return engagements much easier.
Closing a Blaze Spawner
While a Blaze Spawner can be destroyed as usual with a pickaxe, you probably shouldn't do that unless you're absolutely sure you'll never, ever, want to hunt there. Blazes can spawn up to light level 11, up to 4 blocks away from the spawner (and a block above or below it), so simply placing torches on the spawner won't stop them from spawning -- you'll need to plaster the area with a mix of jack-o-lanterns (or glowstone) and torches.
This lighting pattern should suffice to stop squelch a Blaze spawner: (Top view, all on the same level.)
|
|
|
|
|
|
|
|
|
|
|
|
|
|
|
|
|
|
|
|
|
|
|
|
|
|
|
|
|
|
|
|
|
|
|
|
|
|
|
|
|
|
|
|
|
|
|
|
|
|
|
|
|
|
|
|
Farming a Blaze Spawner
There are many hints for fighting blazes on their page. Here are some useful ideas:
- If you haven't brought out the enchanted armour, now's the time. Fire Resistance and Protection are both helpful.
- An iron golem may be helpful, especially once you've got the spawner contained. However, you will need to deal the killing blow to a blaze to get their Blaze Rod(s). One big disadvantage is the golem's huge knockback, which can throw Blazes and their drops out of reach. The golem's distractability is also an issue — between spawnings, they're liable to wander off after Zombie Pigmen and Wither Skeletons.
- As noted above, once you have potions of fire resistance (or an enchanted golden apple,which also has fire resistance), this gets much easier, as you'll be immune to their missile attack. A splash potion can be shared with an iron golem, too.
- A creative option is to mine under their platform to make a bolthole with a narrow opening up to their platform, perhaps 1×3. As they descend into the hole to reach you, you'll be able to get in several hits before they can respond. Fortress stairways (the narrow sort, not like the one leading to the Blazes) can provide a similar bolthole.
- A fishing rod can be useful for pulling blazes into melee range so their drops aren't lost.
- Create a "ceiling" above the spawner-this will keep Blazes from flying out of reach & making it easier to obtain their rods
- It takes 7 snowballs to kill a Blaze. Water won't do-as it will just fizz & vanish.You can try making a Snow Golem, but they'll quickly "melt" due to the Nether heat.
- You may want to seal yourself in the spawner room. So that Wither skeletons, Magma Cubes, or other Blazes that roam the fortress can't ambush from behind (just make sure you have some form of fire resistance with you!)
Portal Travel
The Overworld and the Nether is linked by a factor of 8 (3 in the Xbox 360 Edition), meaning if you create another portal in the Nether and go back to the overworld, the distance you traveled in the Nether is multiplied by eight. Therefore, you can create multiple portals linked to portals in the Nether allowing you to "fast-travel". However, linking Nether portals has a trick and is explained in more detail in the Nether Portal page.
The Hazards
Lava
Lava is prevalent in the Nether, and is in huge lakes (a sea of lava is near the bottom) rivers, and falls from the ceiling. You must be very careful around lava as water buckets will not work in the Nether, and ice will disappear instead of melting into water. Also, lava spreads much farther in the Nether (7 blocks from the source) than in the Overworld (3 blocks) Two good ways of crossing lava are to make a Potion of Fire Resistance or eat an enchanted golden apple; while this effect is active, you will be able to swim through lava without taking damage.
If you can find and reach a lava-flow's source block, you can bucket it just like in the overworld. Unfortunately, that's a rare case in the Nether, as most of the lava is pouring down from great heights. Normally, use cobblestone, or iron bars to contain lava, or direct it away from you. (Netherrack will also work, but a ghast fireball can undo your work in a moment!) As always, if you mine upwards, then watch for dripping red. The drip itself will not damage you, but if you mine a dripping block, lava will come down. If you wish to get rid of lava flowing from the ceiling (in your way, or immediate hazard), you will have to block jump up to the source (or simply aim at the ceiling), and cover the hole with any non-flammmable block. (If it's flowing straight down from a flat ceiling, you may need an extra block next to the flow to place the dam.) One must be extremely careful about the placement of the block, however—if misplaced, the block can just spread the lava wider.
Zombie Pigmen
See Zombie Pigmen
Zombie Pigmen are very common in the Nether and roam in packs of 4-10. They are neutral mobs, meaning that they won't attack unless you attack them. However, if you attack one zombie pigman in a group, like wolves, the whole group (and any others in the vicinity) will swarm you, which will easily kill any unprepared player. There is a set distance, 32 blocks, around each Pigman which you attack, within which other Zombie Pigmen will become hostile to you, if you are in that area. Note that they can only see you in a 16-block radius—any Pigmen between those distances will be turned hostile, but will not move toward you (instead wandering as normal) until you come into sight. This can be a nasty gotcha: When you defend yourself, any Pigmen within a new 32-block radius will be enraged.
It is usually better to leave these creatures alone, but if you want Gold Nuggets, or to increase your level (killing many Zombie Pigmen will give you a lot of experience), you can attack the Pigmen in various, safe ways. Also, if you have to fight Zombie Pigmen, make sure there isn't much (or even better, no) lava or fire surrounding you. You will probably have to move around a lot to fight all of them at once, and distractions will only make it worse. (Also, you may need to collect your stuff after getting killed....)
NOTE, Zombie Pigman wield and carry golden swords, but they usually only drop Rotten Flesh and Gold Nuggets (although, rarely, they will drop either Golden Ingots, Helmets, or Swords)
- Build a killing ground- Near a large group, fence/wall off a controlled area, and set up gates, one-way doors, and suchlike so that you can limit them to approaching one or two at a time, and block them off altogether when needed. Don't forget an escape route!
- Bow and Arrows- Using a bow, you can pick off Zombie Pigmen one at a time at a safe distance.
- Separation- Isolate the pigmen and kill them, but make sure they are far away from any other pigmen, or else they will attack you. Time consuming, but safer than the bow-method.
- Diamond sword, diamond (or iron) armor, and full hunger bar- If you have a diamond sword (preferably enchanted with something like Knockback, which will help for fighting groups), a full set of diamond or iron armor, and you are regenerating, you may be able to beat the whole group. NOTE, this is not recommended as, if you die, you could lose a diamond sword, and a full set of armor. It helps if you staged the fight somewhere away from lava and close to your spawn portal....
- Healing Splash Potions- Saw a large group of pigmen? Feel lucky? Throw some potions in the crowd! Note: you need sword to dispatch survived pigmen Note #2: one splash potion can heal you for 6 (
 ) HP, and also damage the Zombie Pigmen by the same amount. So you need 3 potions to reduce them to 2 () HP, or 4 potions to kill them.
 - Cacti- It is possible to create a cacti fence in the nether by placing some sand and cacti blocks. You can them bump into zombie pigmen to push them into the cacti until they die and drop items. If you are careful not to actually attack them (no clicking!), the nearby pigmen will stay neutral.
Ghasts
See Ghast
As said before, they shoot deadly fireballs at you when you're in their sight of 100 blocks, so you will need to stay alert for incoming fire any time you're in the open, or exposed to open space. Their sounds can give some warning, but travel even further than their fireballs, so sound isn't a reliable warning. Cobblestone will resist the fireballs, which is why you brought so much. Pro tip: when the fireball is within Steve's reach, aim at the ghast and punch. As long as the fire ball is in your FOV you can hit the ghast. NOTE: If surrounded by multiple Ghasts, constantly hitting attack whilst aiming at a Ghast will throw all magma bombs in that direction, regardless of which direction they are coming from (they still need to be within reach). In emergencies, you may be able to change the Difficulty setting to "Peaceful"....
Blazes
See Blaze
Although they are not common in the "general" Nether, there are Blaze spawners in Nether Fortresses. A great way to kill them is to use the nether brick from the dungeon and build a casing over the spawner so you can see through a one block hole and either pick them off with your bow and arrows or use a sword, preferably a sword enchanted with Knockback. Note that Blazes can also spawn elsewhere in Nether Fortresses, not just at spawners.
Magma Cubes
See Magma Cube
Magma Cubes are cube-like mobs that spawn in the Nether, generally near lava (hence the name Magma Cubes). They look like burnt slimes with yellow eyes, and seem to have springs under them (they jump fairly high and the "springing" is visible). Their properties are much like slimes, as killing a large one results in 4 medium-sized ones, once killed yield 4 small ones. The small Magma Cubes drop magma cream (since Minecraft update 1.1) and experience when killed. You can actually prevent magma cubes from spawning in your base. You can make the floor out of transparent blocks so they can't spawn.
Wither Skeletons
See Wither Skeleton
Wither skeletons are tall, darkened skeletons, wielding swords. They can inflict the Wither effect briefly with a hit. However, they are almost as slow as zombies and can't pass through a two-block-high space, which makes them fairly easy to deal with. They drop bones, coal, and rarely a Wither Skull and/or a stone sword.
Brewing
See Brewing
Many resources in the Nether are essential for brewing potions. Nether Wart can be found in Nether Fortresses and is used to create an Awkward Potion, the base for most potions. Blaze rods can be acquired from killing blazes, which only spawn from spawners in Nether Fortresses. Blaze rods are used in crafting a Brewing Stand where all potions are brewed. They may also be crafted down into Blaze Powder, which can be brewed into a strength potion or combined with a slime ball to make Magma Cream. Magma Cream can also be dropped when the player kills Magma Cubes. Glowstone is likewise acquired in the nether, and when brewed with any regular potion it will increase potency (From Poison to Poison II). Gold nuggets dropped by Zombie Pigmen (or crafted from mined ingots) are used to make Glistering Melon, which is used to make instant health potions. Ghast tears are from killed ghasts and help to create regeneration potions.
Settling the Nether
Turns out it wasn't enough for you to explore the Nether. You've decided it looks like a nice place to live. (Or if you're in a multiplayer world, perhaps you seek world domination strategic control of the rapid-travel capability.) So, what do you need to survive here?
You can start by importing some dirt to grow plants. You can even use a hoe to till it into farmland, but there's a catch: With no water available, you need to till the ground, then plant your seed immediately, before the farmland reverts to dirt. Likewise when harvesting wheat, replant immediately, and keep the hoe on your hotbar. This will work for all the farmland crops: wheat, melons, pumpkins, carrots and potatoes. Wither Skeletons can provide bones for bone meal to speed this process. Cocoa plants are farmable on jungle logs as usual, so that gives you cookies too. While you're at it, you can lay out a few blocks of soul sand for a nether wart farm.
You'll want wood for tools and torches, so make a tree farm as well. Oak trees will also provide the occasional apple for gilding, but that's not really a food supply.
Another catch: Trees need space to grow - and Ghasts need space to spawn. Happily, (contrary to popular belief), ghasts do spawn on blocks, and they need a 5×5 space free of transparent blocks and slabs. You can scatter slabs, glass and glowstone around the floor of your tree farm. You can plant saplings with glowstone adjacent, and slabs on top of the diagonal blocks. You can do this in rows for max efficiency. If you're low on glowstone, Jack o' Lanterns and torches will do, but . For the saplings to grow you need them to be well lit. You also need at least 4 blocks of air above the sapling. Using this method of tree farming, you can have a large enclosure for mass wood farming without Ghasts! If not too densely lit, your tree farm will also serve for bone-meal assisted Giant Mushrooms, useful for brewing as well as soup.
Chickens can also be farmed in the Nether (by bringing in eggs), but likewise take space, and warrant anti-Ghast measures. (Don't let your chickens run loose, as if they bump into a Ghast, they can trigger a bug that will start the ghast machine-gunning you through walls, which will probably kill you.) There is gravel around for flint, so with the chickens for feathers, you can make arrows.
As of 1.4.3, you can also bring cows, pigs, and even sheep through the portal, which can provide you with wool, leather, and an variety of meats. Sheep will require special measures: You'll need to get a Grass block with a Silk touch shovel, and use that to start grass on a well-lit dirt floor, so they can regrow their wool.
Some things can't be produced in the Nether, and need to be brought in from the Overworld: There are no ores, so no iron or diamond. (You can make a furnace and smelt wood into charcoal). No cobblestone to be found (nether brick may be acceptable for building, but you can't make tools out of it.) Paper and sugar need sugarcane, which can't grow without water. No string for bows or fishing rods, either. The same applies to some ingredients for brewing: Besides sugar, there's no spider eyes, nor redstone. Gold can be gotten from zombie pigmen, but mining it in the overworld is arguably easier. And of course, water for brewing must be brought in from the Overworld, and stocked in buckets and cauldrons.